Ultimate Checklist: What to Take on a 100 Mile Bike Ride
Get practical tips on what to take on a 100 mile bike ride, including gear, nutrition, and essentials for a confident, comfortable century ride.
You’ve dedicated yourself to training and fundraising, all driven by the powerful purpose of supporting the autism and disability community. The last thing you want is for a preventable gear issue to distract from that mission on ride day. Your preparation is an extension of your commitment. By carefully considering what to take on a 100 mile bike ride, you’re ensuring that all your physical and mental energy can be focused on the journey and the reason you’re pedaling. This guide will walk you through the essential gear, clothing, and personal items that will keep you rolling smoothly, so you can fully embrace the experience and cross the finish line feeling proud of your effort and your impact.
Key Takeaways
- Preparation is Your Foundation: A great ride starts long before you clip in. Ensure your bike is tuned up, pack a basic repair kit for confidence, and use your training rides to figure out the foods and drinks that work best for you.
- Pace and Fuel with a Plan: The two most important rules on ride day are to start slower than you feel you need to and to eat and drink on a consistent schedule. Waiting until you feel hungry or thirsty is too late.
- Treat Training as a Dress Rehearsal: Your long rides are the perfect time to test everything from your cycling shorts to your energy gels. Dialing in your gear and nutrition strategy beforehand eliminates surprises and lets you focus on enjoying the experience.
Your Ultimate 100-Mile Bike Ride Checklist
Getting ready for a 100-mile ride is an exciting milestone! Whether you’re a seasoned cyclist or taking on your first century, having your gear dialed in is the secret to a great day on the bike. At Bike to the Beach, our rides are fully supported with mechanics and amazing rest stops, but being self-sufficient gives you the confidence to focus on what matters: the ride, the community, and the incredible cause you’re supporting. This checklist covers the essentials to make sure you roll up to the starting line prepared for an unforgettable experience.
What Gear Do You Need?
Even with our support vehicles on the course, knowing how to handle a minor mechanical issue will give you major peace of mind. Think of it as your on-the-road insurance policy. A flat tire is the most common culprit, so you’ll want to be ready for it. Pack a small saddle bag with the absolute must-haves for quick fixes.
Your basic repair kit should include:
- A spare inner tube (or two!)
- Tire levers to help remove the tire
- A way to inflate the new tube, like a small hand pump or a CO2 inflator
- A multi-tool for tightening any loose bolts
Having these items on hand means you can solve a small problem quickly and get back to enjoying your ride without a long wait.
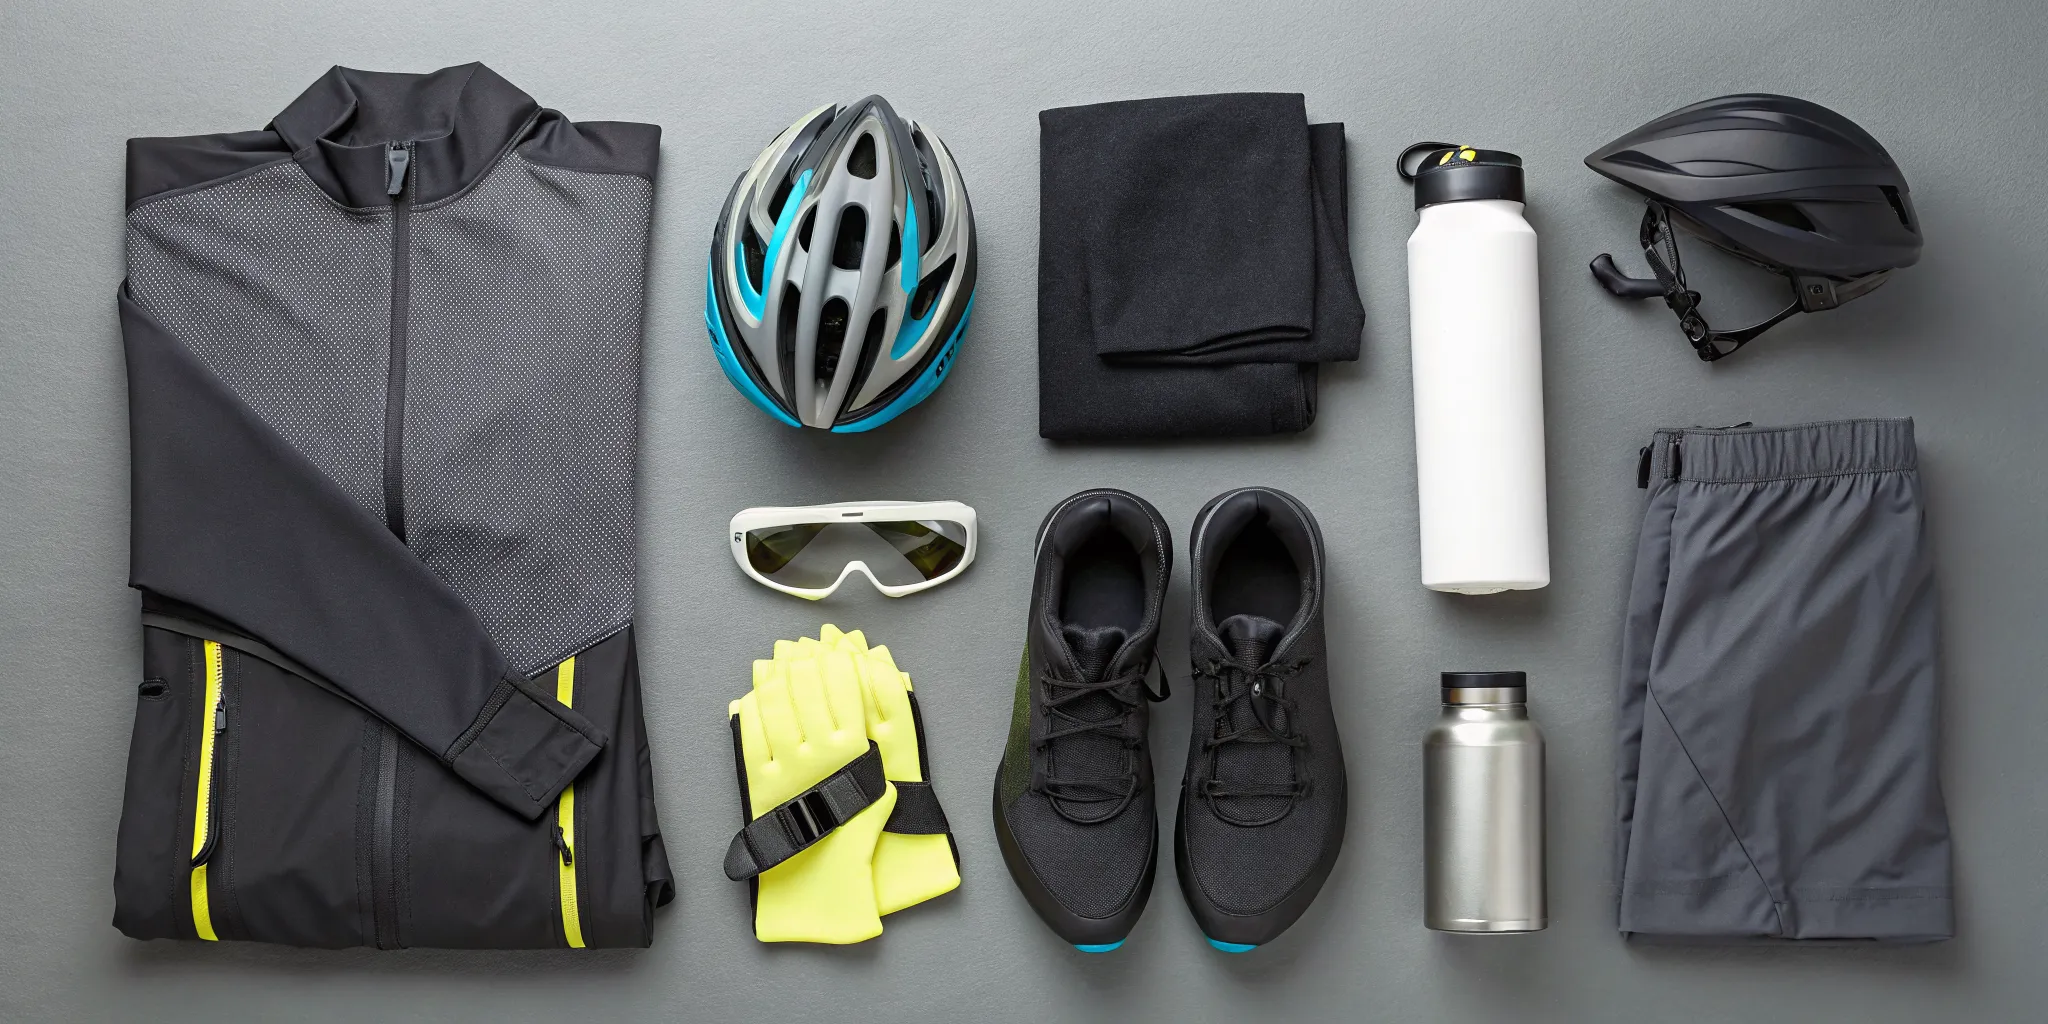
What to Wear and Pack
Comfort is king on a long ride, and the right apparel makes all the difference. The key is to dress in layers. Mornings can be chilly, so start with a light vest or arm warmers over your jersey. You can easily shed them as the day warms up. And of course, show your team spirit with official Bike to the Beach apparel!
Beyond your cycling kit, don’t forget these essentials:
- Safety: A helmet is non-negotiable. Sunglasses are also a must for protecting your eyes from sun and debris.
- Personal Items: Pack your phone, a wallet with your ID, a credit card, some cash, and your health insurance card in a small, waterproof bag.
How to Fuel and Hydrate
A 100-mile ride is a marathon, not a sprint, and your body needs fuel to get to the finish line. While our rest stops are famous for being fully stocked with delicious food, it’s always a good idea to carry some of your own trusted snacks and hydration. Plan to eat and drink consistently from the very first hour, long before you feel hungry or thirsty.
Pack snacks that are easy to eat on the bike, like:
- Energy bars, gels, or chews
- A banana or a small peanut butter and jelly sandwich
- Salty snacks like pretzels to help with electrolyte replacement
Start with two full water bottles, and consider adding an electrolyte mix to one. Staying fueled is part of the journey, giving you the strength to pedal for a purpose and remember why we bike.
Pack Your Essential Ride Gear
Having the right gear means you can focus on the fun, the community, and the finish line. While our rides are fully supported with mechanics and aid stations, being prepared with your own essentials gives you the confidence to handle anything the road throws your way. Think of it as your personal toolkit for a smooth, worry-free ride. Here’s a breakdown of what to pack in your saddlebag or jersey pockets.
Bike Repair Kit and Spares
Nothing builds confidence like knowing you can handle a minor mechanical issue. A flat tire is the most common hiccup, so your repair kit should focus on that. Be sure to pack at least one spare inner tube that fits your tires, a set of tire levers to help remove the tire, and a way to re-inflate it. You can choose either a small, portable hand pump or a CO2 inflator with cartridges for a quicker fix. A compact multi-tool is also a great addition for tightening any bolts that might loosen along the way.
Safety First: Lights, Helmet, and More
This one is non-negotiable: you must wear a helmet for the entire ride. Your next priority is making sure you are visible to everyone else on the road. We recommend using a white front light and a red rear light, even during the day, to ensure you stand out. Sunglasses are also a must-have to protect your eyes from sun, wind, and road debris. For extra comfort, a cycling cap worn under your helmet can help manage sweat and shield you from the sun. You can find great ride apparel in the Bike to the Beach shop.
Navigation and Ride Day Accessories
While all Bike to the Beach routes are clearly marked with signage and supported by volunteers, having your own navigation is a great backup. A simple bike computer is perfect for tracking your mileage and speed, which helps you pace yourself and celebrate each milestone you hit. Many riders also use a GPS app on their phone with the route pre-loaded. To carry your repair kit, phone, and other small items, a small saddlebag or frame bag is ideal. It keeps your gear secure and your jersey pockets free for easy-to-reach snacks.
Don’t Forget These Small Essentials
A few small items can make a huge difference in your ride experience. Always bring your fully charged phone, your ID, a credit card, and a little bit of cash. Some riders also wear a RoadID bracelet with emergency contact information for extra peace of mind. It’s also smart to have a small first-aid kit with basics like bandages and antiseptic wipes. Finally, think about the finish line! Packing a small bag with a change of clothes, especially dry socks and a comfortable shirt, makes celebrating on the beach that much better. It’s all part of the amazing shared experience we create together.
What to Wear for a Century Ride
Dressing for a 100-mile ride is all about smart preparation. The right clothing will keep you comfortable, protected, and focused on the journey, not on chafing or changing temperatures. Your gear choices can make a huge difference in how you feel during the final miles of your ride. Think in terms of versatile layers and essential items that will keep you going strong from the start line to the beach.
Layering for Comfort and Performance
The key to all-day comfort is layering. A century ride often starts in the cool morning air and finishes in the afternoon sun. Start with your core gear: padded bike shorts and a short-sleeve jersey. From there, add removable layers like arm warmers and a lightweight vest or windbreaker. These are easy to peel off and stash in a pocket as the day warms up. A light, packable rain jacket is also a great idea, just in case the weather takes an unexpected turn. You can find great ride-day apparel in the Bike to the Beach shop.
Personal Items for a Smoother Ride
Beyond your cycling kit, a few personal items are essential for a smooth ride. Always carry your phone, an ID, a credit card, and a little bit of cash in a small, secure pouch. Sunscreen is non-negotiable, so bring a small tube to reapply at rest stops. The same goes for chamois cream, which can be a lifesaver for preventing saddle sores. A portable phone charger can also provide peace of mind, ensuring you can capture photos and stay connected. Packing these small things helps you focus on your personal why for riding.
How to Prepare for Any Weather
While you can’t control the weather, you can prepare for it. Always check the forecast the day before your ride, but be ready for anything. One of the best parts of a Bike to the Beach event is that it’s a fully supported ride. Our rest stops are stocked with fuel and hydration, which means you don’t have to weigh yourself down carrying everything for the entire day. This allows you to pack lighter and focus on enjoying the ride and the community around you. You can see what a supported ride day looks like and plan accordingly.
What to Eat and Drink on a 100-Mile Ride
Fueling your body for a 100-mile ride is just as important as training on the bike. Think of it as managing your personal energy system. A smart nutrition and hydration plan will keep you feeling strong, prevent the dreaded “bonk” (when your body runs out of fuel), and make the entire experience more enjoyable. While it might seem like a lot to manage, remember that every Bike to the Beach ride is fully supported. We have amazing volunteers at rest stops every 15-20 miles, ready with snacks, water, and sports drinks to keep you going.
Your goal is to create a simple, repeatable plan that you can practice during your training rides. This way, when you join us for a ride in New York or any of our other locations, your fueling strategy will be second nature. You can focus less on what’s in your pocket and more on the beautiful scenery and the incredible community riding alongside you. Let’s get your plan dialed in.
Your Pre-Ride Fueling Strategy
Your century ride fueling starts before you even clip in. Eating a substantial, carbohydrate-rich breakfast one to two hours before you start is a great strategy. This tops off your energy stores so you begin the ride with a full tank, meaning you won’t have to start eating quite as early in the ride.
Focus on foods that are familiar to your system. Think oatmeal with fruit, a bagel with peanut butter, or toast and a banana. Avoid overly fatty or fibrous foods that can be hard to digest. The goal is simple, accessible energy. A solid breakfast sets the tone for the day and gives you the confidence that you’re starting strong.
Nutrition During the Ride: What and When to Eat
The golden rule of on-bike nutrition is to eat early and often. Don’t wait until you feel hungry, because by then it’s often too late. A great starting point is to aim for 30 to 60 grams of carbohydrates per hour after the first hour of riding.
The most important thing you can do is practice your nutrition plan during your long training rides. This is your time to figure out which foods and drinks work best for your body. Never, ever try a new gel, bar, or snack on the day of the big ride! Use your training to discover your go-to fuel sources, so you can ride with the confidence that you are supporting the reason why we bike.
The Best Snacks to Pack for Your Ride
When it comes to snacks, variety and portability are key. You’ll want a mix of options to prevent flavor fatigue. Many cyclists use a combination of sports-specific products and real food.
Great options to carry in your jersey pockets include:
- Energy bars, gels, or chews
- A simple sandwich, like peanut butter and jelly
- Salty snacks like pretzels or small boiled potatoes with salt
- Fruit, such as a banana or a handful of dates
- Fig bars or other soft-baked cookies
Remember, our rest stops are fully stocked with snacks, so you don’t need to carry your entire day’s worth of food. Just bring your personal favorites to supplement what’s available.
Your Hydration Plan: Before, During, and After
Just like with food, the key to hydration is to drink before you feel thirsty. Aim to take a few sips from your water bottle every 15-20 minutes. For a long, hot ride, water alone isn’t enough. You also need to replace the essential salts (electrolytes) you lose through sweat.
Many riders add electrolyte tablets or powder mixes to one of their water bottles. This is an easy and effective way to stay on top of your hydration. While a solo century might require carrying multiple bottles, you can travel lighter during our Florida ride. Every rest stop is an opportunity to refill your bottles with water and hydration drinks, ensuring you have what you need for every leg of the journey.
Post-Ride Recovery: What to Eat
You did it! You crossed the finish line. Now it’s time to kickstart your recovery. As soon as you can, try to have a meal that contains both protein and carbohydrates. The carbs will help replenish your depleted energy stores, while the protein is essential for repairing your hard-working muscles.
A smoothie, a sandwich, or a full meal are all great options. And of course, keep drinking water or other fluids to rehydrate. At every Bike to the Beach finish line, we celebrate your incredible achievement with a party complete with food and drinks. It’s the perfect way to refuel your body while sharing stories with the amazing community you just rode 100 miles with.
Common Fueling and Hydration Mistakes to Avoid
Dialing in your nutrition and hydration is one of the most important things you can do to guarantee a great ride. When you give your body the fuel it needs, you’ll have more energy, feel stronger, and have way more fun from the first mile to the last. The goal isn’t just to avoid “bonking” (the dreaded wall of exhaustion), but to feel fantastic as you pedal toward the beach. Think of your food and water as essential gear. With a little planning, you can easily sidestep the common mistakes many riders make. Your long training rides are the perfect time to practice and figure out your personal cycling nutrition strategy, so you can show up on ride day feeling confident and prepared.
Waiting Too Long to Eat or Drink
This is the number one mistake riders make. By the time you feel hungry or thirsty, you’re already behind on fuel and fluids. Your body is constantly burning energy, and you need to replenish it before your tank runs empty. Start fueling within the first 30 minutes of your ride, and continue to take small sips of water and bites of food consistently. A good rule of thumb is to eat a small snack every 45 to 60 minutes and drink every 15 to 20 minutes. Set a recurring alarm on your watch or bike computer if you need a reminder. It’s all about staying ahead of your body’s needs.
Trying New Foods on Ride Day
A century ride is not the time to experiment with a new energy gel or a breakfast you’ve never had before. What works for one rider might not work for you, and the last thing you want is an upset stomach miles from the finish line. Use your training rides to test everything. Figure out which snacks you enjoy, which drinks settle well, and what pre-ride meal gives you sustained energy. On ride day, stick to your tried-and-true favorites. This way, there are no surprises, and you can focus on enjoying the ride.
Forgetting Your Electrolytes
When you sweat, you lose more than just water. You also lose essential minerals called electrolytes, like sodium and potassium, which are critical for muscle function and hydration. Simply drinking water isn’t enough to replace them on a long, hot ride. Forgetting electrolytes can lead to muscle cramps, fatigue, and dehydration. Many riders add electrolyte tablets or powders to their water bottles to stay balanced. During your training, find a mix that tastes good to you and pack enough for the entire ride. Our rest stops will have water and sports drinks to help you refill and refuel.
Under-Hydrating in the Final Miles
It’s easy to get caught up in the excitement as you get closer to the beach and forget to keep drinking. But those final miles are when your body is most fatigued and needs hydration the most. Dehydration can sneak up on you, reducing your power and making the end of the ride feel much harder than it needs to. Make a conscious effort to keep sipping from your water bottle all the way to the finish. When you stop at the final rest stops on a Bike to the Beach ride, take a moment to drink a full cup of water before you get back on the bike. You’ll feel stronger for it.
Don’t Skip Your Pre-Ride Bike Maintenance
You’ve put in the training miles and dedicated yourself to the cause. The last thing you want is for a preventable mechanical issue to sideline you on ride day. Giving your bike a little attention before you head to the starting line is one of the most important steps you can take to ensure a safe and successful ride. Think of it as setting both you and your bike up for success. A well-maintained bike isn’t just safer; it’s more efficient and more fun to ride, letting you focus on the journey, the community, and the incredible finish line waiting for you.
Taking a few minutes to check your equipment can save you from a long walk or a frustrating roadside repair. You don’t need to be a professional mechanic to handle the basics. A simple, routine inspection will help you catch potential problems early and give you the confidence that your bike is as ready for the challenge as you are. It’s a small time investment that pays off big, ensuring your energy goes toward pedaling for a purpose, not wrestling with your gear.
Perform a Pre-Ride Bike Check
The easiest way to make sure your bike is ready to roll is by performing a quick pre-ride inspection. A great, easy-to-remember method is the ABC Quick Check developed by the League of American Bicyclists. It’s a simple, fast routine that covers the most critical systems on your bike.
- A is for Air: Check your tire pressure.
- B is for Brakes: Squeeze your brake levers to ensure they are firm and responsive.
- C is for Chain & Cranks: Inspect your chain and spin your pedals to check for smooth operation.
Making this a habit before every ride, especially your longer training rides, will help you spot issues before they become ride-ending problems.
Key Components to Inspect
Beyond the quick ABCs, it’s smart to take a closer look at a few key areas in the week leading up to your century ride. Pay special attention to these components:
- Tires: Make sure your tires are properly inflated to the pressure listed on the tire’s sidewall. Look for any embedded glass or debris in the tread and check for significant wear or cracks.
- Brakes: Test your front and rear brakes to confirm they engage smoothly and stop your bike effectively. Look at your brake pads; if they’re worn down to the indicator line, it’s time to replace them.
- Chain and Gears: Your chain should be clean and lightly lubricated. Run through all your gears to make sure they shift smoothly without skipping or making loud grinding noises.
Know When to Get a Professional Tune-Up
While you can handle many basic checks yourself, sometimes you need an expert. If you notice persistent issues like clicking sounds you can’t locate, gears that won’t shift correctly, or brakes that feel spongy even after adjustment, it’s time to visit a local bike shop. Getting a professional tune-up a week or two before the event is a fantastic way to get peace of mind. The mechanics will give your bike a thorough inspection, make precise adjustments, and ensure it’s in peak condition for your 100-mile journey. It’s a worthy investment in your safety and enjoyment on ride day.
How to Train for a 100-Mile Bike Ride
Training for a century ride is a journey of its own, and it’s about more than just logging miles. It’s about building strength, confidence, and the endurance to enjoy every moment of your ride. A smart training plan makes the goal achievable, whether you’re a seasoned cyclist or new to the sport. Remember, consistency is your best friend.
Build Your Base Mileage
Before you tackle long distances, you need a solid foundation. Building your base mileage means getting your body accustomed to time in the saddle. Focus on consistency, not intensity. Aim for two to three shorter rides during the week, whatever fits your schedule. These regular rides are more important than one massive effort. They prepare your muscles, improve your efficiency, and make the weekend’s long ride feel that much easier. Think of it as making a deposit in your endurance bank for a future ride like our New England event.
Plan Your Long Ride Progression
Your weekly long ride is where you’ll see the most progress. The key is to increase your distance gradually. This allows your body to adapt and get stronger without risking injury or burnout. A good rule of thumb is to add five to ten miles to your long ride each week. For example, if you ride 30 miles one weekend, aim for 35-40 the next. Your longest training ride should be about 75-80 miles, completed two weeks before the main event. This gives you the confidence you can go the distance while allowing time for recovery.
Test Your Gear and Nutrition Plan
Your long training rides are the perfect dress rehearsal for event day. This is your chance to test everything: your bike, your clothes, and your fuel. Use these rides to practice eating the snacks you plan to carry and drinking from your water bottles. Make sure your cycling kit is comfortable and doesn’t chafe after a few hours. This is also the time to practice using your repair kit. Knowing your gear and nutrition plan works will calm any ride-day nerves. You can find great jerseys and water bottles in the Bike to the Beach shop to get you started.
Prioritize Recovery and Rest
Training doesn’t just happen on the bike; rest is when your body rebuilds and gets stronger. Don’t be afraid to take it easy. A “deload week” every third or fourth week, where you reduce your mileage by about 30%, is a great way to let your body recover and prevent burnout. Listen to your body, get plenty of sleep, and take rest days seriously. Connecting with your motivation is also a form of recovery. Remembering why we bike can refuel your spirit just as much as rest refuels your muscles.
How to Pace Yourself on a Century Ride
Riding 100 miles is an incredible accomplishment, and one of the biggest keys to crossing that finish line with a smile is smart pacing. It’s easy to get swept up in the excitement at the starting line and pedal out too fast, but a century ride is all about endurance, not a sprint. Pacing isn’t just about how fast your legs are moving; it’s a mental and strategic game that you play from the first mile to the last.
The goal is to finish strong and feel proud of your effort, not to burn out by mile 50. Think of your energy as a full tank of gas. You want to make it last the entire trip, so you’ll need to be efficient and strategic about how you use it. Let’s break down how to do just that.
Start Smart, Not Fast
The energy at the start of a big ride is electric, and it’s tempting to push the pace while your legs are fresh. But the single best piece of advice for a century ride is to start slower than you think you should. Seriously. The first 25 to 50 miles should feel almost too easy. This conservative start helps your body conserve precious glycogen stores, which you will absolutely need for the second half of the ride. By keeping your heart rate down and your effort steady, you prevent early fatigue and set yourself up for a strong finish. Remember, it’s not about who is fastest in the first hour; it’s about having the power to pedal confidently through the final miles.
Make the Most of Your Rest Stops
One of the best parts of a supported ride like Bike to the Beach is our fully-stocked rest stops. These are your strategic pit crews! Because you know you’ll have access to food and water, you can carry less on your bike, which makes for a lighter, more comfortable ride. Treat each stop as a planned part of your strategy. Use the time to refill your bottles, grab a snack you know works for you, use the restroom, and do a quick stretch. Don’t linger so long that your muscles get cold, but don’t rush through it either. A few focused minutes to refuel and reset can make all the difference in your performance and morale for the next leg of the journey.
Master the Mental Game for the Final Miles
There will likely come a point in the last 20 miles when your mind is ready to quit long before your legs are. This is where your mental training takes over. The physical fatigue is real, but pushing through the mental barriers is what gets you to the beach. When things get tough, break the remaining distance into smaller, more manageable chunks. Focus on just getting to the next landmark or the final rest stop.
This is also the perfect time to reconnect with why we bike. Think about the community you’re supporting and the impact of every dollar you’ve raised. That purpose is powerful fuel. Ride with a friend, chat with a fellow rider, and lean on the incredible community around you. You’re all in this together, and that shared energy can carry you through the toughest moments.
Ready to Put Your Training to the Test?
You’ve put in the miles, built your endurance, and learned what your body needs to go the distance. Now it’s time to bring all that hard work together for a ride day you can be proud of. The key to a great century experience isn’t just about physical strength; it’s about smart preparation. Think of your final long training rides as a dress rehearsal for the main event, giving you a chance to fine-tune your strategy and build confidence.
Use these long rides to test your gear and nutrition plan under real-world conditions. Don’t wait until you feel hungry to eat; practice fueling consistently from the first hour of your ride. The same goes for hydration. Staying on top of your water and electrolyte intake is crucial for preventing fatigue and cramps. While our Bike to the Beach events feature fully-stocked rest stops every 15 miles, knowing what your body needs between those points is a game-changer. And remember, safety is always the top priority. Every ride, long or short, should start with putting on your helmet and checking that you have your basic repair tools.
All your preparation has led to this moment. You’re ready. The best part of joining a Bike to the Beach ride is that you get to share this accomplishment with a community of passionate people all pedaling for a purpose. We handle the logistics so you can focus on the ride, the scenery, and the incredible feeling of crossing that finish line.
It’s time to pick your beach. Join us for a ride that makes a real impact in your local community.
- Find your ride in New England
- Join us in New York
- Ride with us in the DC, Maryland, and Virginia area
- Head to the beach in Florida
Related Articles
- 8 Steps to Prepare for a 100 Mile Bike Ride
- How to Crush Your First 100 Mile Bike Ride
- Your Guide to the Best Century Rides of 2026
- How to Train for Your First 50 Mile Bike Ride
Frequently Asked Questions
How long should my longest training ride be before the 100-mile event? This is a great question, and the answer might surprise you. Your longest training ride should be about 75 to 80 miles, completed about two weeks before the event. This distance is long enough to give you the physical and mental confidence that you can go the distance, but it also gives your body plenty of time to recover and be fresh for ride day. The adrenaline, excitement, and incredible community energy will absolutely carry you through those final miles to the beach.
What if I get a flat tire and don’t know how to fix it? First, take a deep breath. This is a very common worry, and you won’t be left stranded. All Bike to the Beach rides are fully supported, which means we have support vehicles and mechanics on the course to help you with any issues. That said, learning how to fix a flat before the ride is a huge confidence builder. Knowing you have the tools and the basic skills to be self-sufficient gives you peace of mind so you can relax and enjoy the ride, secure in the knowledge that you (and our team) have it covered.
I’m nervous about keeping up. What if I’m the slowest rider? Please don’t let this worry you for a second. Bike to the Beach is a ride, not a race, and our community is made up of cyclists of all speeds and experience levels. You will see everything from elite athletes to first-time riders, and everyone is celebrated for showing up to support the cause. The goal is to have a safe, fun, and meaningful day on the bike. You should ride at your own pace, enjoy the scenery, and connect with the people around you. We are all in this together, and we will be there to cheer you across the finish line no matter when you arrive.
With fully stocked rest stops, do I really need to carry my own food and water? While our rest stops are famous for being amazing, we always recommend carrying a few of your own trusted snacks and starting with full water bottles. Your long training rides are the perfect time to figure out which energy bars or gels work best for your body. On ride day, you want to stick to those tried-and-true favorites to avoid any surprises. Think of the rest stops as fantastic opportunities to refuel and supplement your personal stash, not as a complete replacement for it.
What’s the most common mistake you see riders make on event day? The most common mistake, by far, is starting out too fast. The energy at the starting line is electric, and it’s so easy to get caught up in the excitement and push harder than you normally would. A century ride is a marathon, not a sprint. The smartest riders are the ones who feel like they are going almost too slow for the first 25 miles. By conserving your energy early on, you ensure you have the strength and stamina to feel great and finish strong.