What to Bring on a Long Bike Ride Checklist
Get a practical what to bring on a long bike ride checklist for clothing, fuel, repair tools, navigation, ride support, and confident event-day prep.
A flat tire or empty bottle can turn a long charity ride into a wait for help. Pack for miles, weather, and the reason you are riding.
Register for an upcoming Bike to the Beach ride once your checklist is ready, then use your route details to fine-tune what you carry.
What to bring on a long bike ride includes a helmet, padded cycling clothing, two full bottles. Familiar snacks, ID, payment, a charged phone, route access, sunscreen, and a small repair kit. On a supported Bike to the Beach route, also bring ride-day materials and know where rest stops, SAG, medical, and mechanical help fit in.
Your packing list should answer two questions: what keeps you self-sufficient between stops, and what lets supported ride services help you faster? Start with “What to bring on a long bike ride: the quick checklist,” then tailor it to your route, weather, and cause. Here is how:
What to bring on a long bike ride: the quick checklist
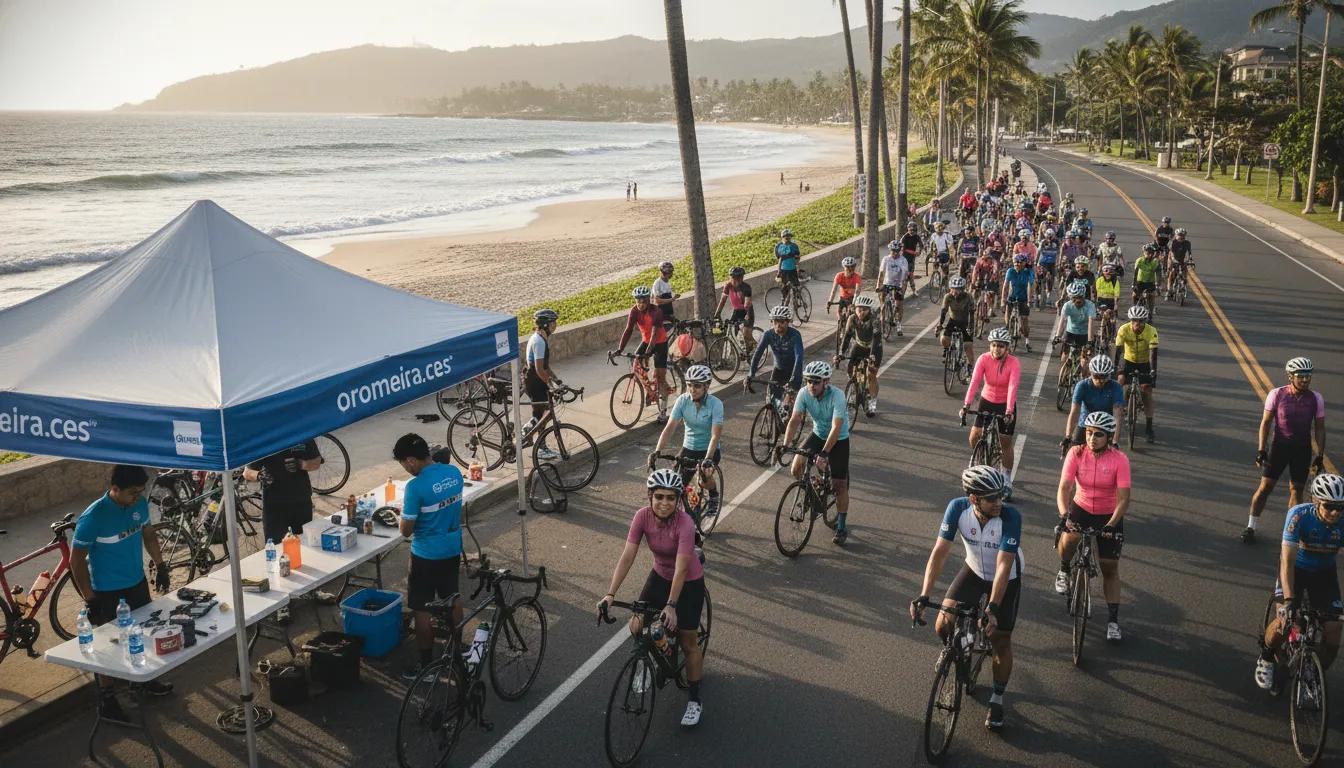
A supported ride still starts with what you carry. For a 25, 50, 70, or 100 mile Bike to the Beach route, pack for comfort, simple fixes, and changing weather. Use this checklist the night before, then do one quick check before you roll out.
On your bike
Set up the items you need while moving before ride morning. A phone or bike computer should be charged, mounted, and ready for the route. Review Bike to the Beach event day logistics and support before deciding what must stay with you.
- Helmet, front and rear lights, and sunglasses.
- Filled water bottles in secure cages.
- Charged phone or bike computer with route loaded.
- Frame pump, if it does not fit in your saddle bag.
- Small cue sheet or emergency contact card, if used for your event.
Plan for heat, even on a supported course. The CDC advises athletes in hot conditions to drink more water than usual and not wait for thirst. Check the forecast, dress for the day, and start with full bottles.
In your jersey pockets and saddle bag
Your pockets hold items you may reach for at a stop. Keep snacks easy to open and familiar from training rides. A zip bag can protect your phone, cash, and ID from rain or sweat.
- Ride snacks that you have tested in training.
- ID, emergency contact details, payment card, and a little cash.
- Sunscreen, lip balm, tissues, and any personal medicine.
- Light rain shell or packable layer when weather calls for it.
Your saddle bag is for getting rolling again after a common bike issue. Support staff can help, but carrying a basic repair kit saves time between stops. Pack the kit together, so nothing is missing when you need it.
- Spare tube sized for your tire, or tubeless repair plugs.
- Tire levers and a mini pump or CO2 inflator.
- Multi-tool with the bits that fit your bike.
- Patch kit, valve adapter if needed, and chain quick link.
In your drop bag or car
Stage gear that makes the finish and ride home easier. This is also a good place for items used before the start, such as an extra layer. The Bike to the Beach guide to essential cycling gear can help if you are building your kit.
- Dry shirt, socks, comfortable shoes, and a warm layer.
- Towel, wipes, and a bag for damp cycling clothes.
- Recovery snack and drink for after the ride.
- Phone charging cable, keys, and any ride check-in items.
Lay out each group in its place: bike, pockets, saddle bag, and finish bag. That simple sort helps you spot gaps without overpacking. It keeps what matters close at hand.
What should you wear for a long distance bike ride?
Comfort from the first mile
On a long supported ride, wear kit that feels good in the saddle and handles sweat well. Start with padded cycling shorts or bibs that you have worn on training rides. Pair them with a fitted, moisture-wicking jersey, rather than trying new clothing on event morning.
Good cycling clothing does not need to be complex. Choose smooth socks that sit well in your shoes, plus full-finger or half-finger cycling gloves. Sunglasses can make a bright or breezy ride more comfortable. If you are building your kit, this guide to essential cycling gear can help you prepare.
Layers for changing weather
Check the forecast before you leave, then plan for the coolest and wettest part of the route. A light base layer or arm warmers can help on an early start. Bring a packable wind or rain shell if coastal wind or showers are possible.
Warm days need a simple plan. The CDC advises people who exercise in heat to wear loose, lightweight, light-colored clothing. For cycling, choose light pieces that breathe and do not bunch in the saddle. Keep the shell easy to remove and store as conditions shift.
- Padded shorts or bibs tested on longer rides.
- Moisture-wicking jersey with pockets for small ride needs.
- Light socks, cycling gloves, and secure sunglasses.
- Arm warmers or a base layer for a cool start.
- Packable wind or rain shell when rain is possible.
Sun and ride-day comfort
Exposed skin needs care on a long outdoor ride. Apply sunscreen before the start and carry a small size if you may need more later. The CDC says to reapply sunscreen as directed on the package. A supported rest stop gives you a useful time to do this.
Put comfort items where you can reach them without emptying your bag. Your jersey pockets can hold sunscreen, a thin shell, and lens wipes. Before the ride, try your full outfit on a training spin, including each layer you plan to carry. A small clothing issue at home is easier to fix before a full day on the bike.
Choose your Bike to the Beach route before ride week, then match your fuel, bottles, and gear to the distance you are riding.
How much water and food should you bring?
When deciding what to bring on a long bike ride, start with water and food you can reach while riding. Carry enough to begin the route with confidence, then plan where you can refill. Supported stops help, but a missed turn or slower pace can add time between stops.
Bottles for the route
Bring bottles that fit your bike and your expected distance between refills. One bottle can hold water. A second can hold an electrolyte drink if it is part of your tested ride plan. Take steady drinks along the route instead of saving your water for one long stop.
Weather changes the plan. In hot conditions, the CDC advises athletes to drink more water than usual. It also says not to wait until you feel thirsty. Check conditions before you roll out, and carry extra fluid when heat may make the ride harder.
Heat safety means paying attention to your body and your group. Muscle cramps can be an early sign of heat illness. If you feel faint or weak, stop riding and get to a cool place. Do not try to reach the next stop first.
Snacks you can eat on the bike
Pack small carbohydrate snacks that are simple to open and easy to eat. Examples include a banana, chews, a bar, or a small sandwich used in training. Keep food in a jersey pocket or top-tube bag. Your fuel should not depend on a stop.
A cycling study found that 39 or 64 grams of carbohydrate per hour improved endurance ride performance. Use that range as a planning guide. Then choose portions your stomach handles well. Try your snacks on training rides before event day.
- Pack familiar foods in separate servings so you can track what you have eaten.
- Bring one backup snack in case a stop comes later than planned.
- Use wrappers or resealable bags that fit back into your pocket after eating.
Rest stops as support, not the full plan
Bike to the Beach rides include support at rest stops, which can help you refill and reset. Still, begin with your own bottles and snacks. Review event day logistics and support before your ride. You can then match the event plan to your packing plan.
At each stop, check your bottles, food supply, and how you feel before moving on. In warmer weather, pause longer if needed. Watch fellow riders for signs of trouble. A simple refill routine keeps the day focused on steady riding and shared purpose.
Repair tools and safety basics to carry
A flat-tire kit you know how to use
Start with the repair most riders can handle roadside: a flat tire. Pack a tube that fits your tire, two tire levers, and a mini pump or CO2 inflator. Before event day, practice removing a wheel, replacing a tube, and adding air at home.
When choosing what to bring on a long bike ride, keep the kit small enough for every training ride. The Bike to the Beach guide to essential cycling gear can help you check your full setup before the event.
- One spare tube in the correct wheel and valve size.
- Two tire levers and a small patch kit.
- A mini pump, or an inflator with matching CO2 cartridges.
- A multi-tool with bits that match your bike’s bolts.
Keep the spare tube in a small bag so it stays clean inside your saddle bag. If you choose CO2, learn how your inflator works before you need it. A mini pump is a simple backup if a first repair does not hold.
Small fixes and personal safety
Add a multi-tool for simple adjustments, plus a patch kit after a puncture. Test that you can reach each item without unpacking every snack or layer. Simple organization saves time when you are stopped by the road.
Keep ID, an emergency contact, and a cash or payment card in a dry pouch. Bring charged front and rear lights, even for a daylight start. Pack basic first aid supplies for a small scrape while you seek more help.
Heat is also a safety issue on a long outdoor ride. The CDC advises athletes to stop activity and move to a cool place if they feel faint or weak. Keep your phone easy to reach, not buried under your repair gear.
Support as backup, not your plan
A supported charity ride still calls for self-rescue basics. Mechanical help may be assisting another rider when your tire goes flat. Carrying your own flat kit lets you fix a small issue and continue when it is safe.
For a Bike to the Beach ride, review the event day logistics and support before you pack. Save key ride details on your phone. Note how to ask for support if a repair is beyond your skill.
Store these items in one saddle bag or zipped pouch. Before departure, check for your tube, pump or CO2, levers, tool, ID, lights, phone, payment card, and first aid. Being ready keeps a small problem from deciding your day on the bike.
Phone, navigation, and event-day materials
Power and route access
When deciding what to bring on a long bike ride, treat your phone as ride gear, not an afterthought. Charge it fully the night before, then pack a small portable battery and the matching cable. Turn on low-power mode if your battery drains fast. Keep the phone protected from sweat or rain.
Load the route before you leave and test the app at home. Bike to the Beach riders have access to navigation through Ride with GPS. This makes route checks easier on event day. A secure handlebar mount helps you glance at directions without digging through a pocket. Keep the volume high enough to hear route alerts.
Check-in items and contacts
Bring a photo ID and any registration email, packet pickup note, bib, wristband, or ride pass supplied for your event. Save a screen shot of key details in case cell service is slow. Review the local event day logistics and support page before packing. Arrival and packet steps may vary by ride.
Store the ride support number and your team captain’s number in your phone. Write one key contact on paper as a backup, then tuck it beside your ID. If you feel faint or weak during a warm ride, stop riding and seek help. The CDC guidance for athletes in heat gives the same stop-first direction.
Fundraising and photos
A charity ride also gives you a simple way to share the cause. Save your personal fundraising link where you can copy it quickly, or keep a QR code image on your phone. It can help friends donate when they meet you at a stop or finish area. For ideas before ride day, see Bike to the Beach’s fundraising success tips.
Photos can mark the day and share the community behind the miles. Take them only while stopped, off the riding line, and clear of riders entering a rest stop. Ask before posting close photos of other riders or families. Do not handle a phone while steering, even if the view feels worth capturing.
Before rolling out, place your phone, battery, cable, ID, registration items, contacts, and fundraising code in one zippered pocket or small bag. A quick check at the start keeps route help, check-in proof, and team information within reach during the ride.
What does Bike to the Beach support provide?
Support built into the route
A Bike to the Beach ride is supported, but riders still arrive ready to manage their own day. Rest stops are set about every 15 miles, with hydration, nutrition, and basic mechanical support. That plan gives riders places to pause and refill. They can eat and check how they feel before moving on.
Support also extends between stops. SAG vehicles are on the course, and professional mechanical support can help when a bike issue needs more care. Medical support is part of the ride plan as well. For route finding, riders can use Ride with GPS to follow the event course.
Before ride day, read your route’s event day logistics and support details. Start times, check-in steps, and course notes may shape what fits in your pockets or ride bag. Supported means help is available. It does not mean riders should start with empty bottles or no repair basics.
What support covers, and what you carry
Think of event support as a safety net and a refill plan. It cannot replace the items you may need before reaching the next stop. When deciding what to bring on a long bike ride, pack for miles between support points. Also plan for changing weather and small bike issues.
| Bike to the Beach support provides. | You should still bring. |
|---|---|
| Rest stops about every 15 miles with hydration and nutrition. | Filled bottles and food for the first miles and time between stops. |
| Basic mechanical support at rest stops. | Spare tube, tire levers, pump or inflator, and a small multi-tool. |
| Professional mechanical support and SAG vehicles on course. | A bike checked before the ride and a charged phone. |
| Medical support during the event. | ID, emergency contact details, sunscreen, and needed personal items. |
| Route access through Ride with GPS. | Downloaded route access, phone mount or cycling computer, and battery power. |
Your bottle and food choices should match conditions and your own needs. On hot days, active people can become dehydrated or develop heat-related illness. The CDC advises people exercising in heat to drink more water than usual. It also says not to wait for thirst. Rest stops help you refill, but bring enough to reach the first one.
A simple ride-day check
Set out your gear before leaving home. Put your helmet, filled bottles, ride food, phone, ID, repair items, and route access in one place. Add sunscreen and layers that fit the forecast. If you use medication or another personal health item, pack it within easy reach.
Then check your bike and phone. Tires should be ready for the start, your route should load, and your phone should have enough charge. Bike to the Beach’s guide to essential cycling gear can help riders review setup and preparation before event day.
During the ride, use support early when you need it. Stop for hydration or food, ask for bike help when something feels wrong, and seek medical support if needed. If you cannot safely continue, SAG support is there to help on the course.
How to pack without overloading your bike
Packing for a long ride works best as a small plan, not a stuffed bag. Carry what solves a likely need: water, food, repair tools, identification, and weather layers. Then leave out items that add bulk or block the basics.
If you are deciding what to bring on a long bike ride, pack with the ride in mind. A charity ride may offer route support, yet your own basics should stay easy to reach. This routine helps you load the bike the night before and make a calm morning check.
The night-before packing routine
Start when you have time to think. Lay everything out beside the bike, so small items do not hide in a drawer or get doubled up. Event riders can compare their list with Bike to the Beach guidance on essential cycling gear.
-
Make an essentials pile. Set out your repair kit, pump or inflator, phone, identification, payment card, ride information, bottles, food, and clothing layer. Keep optional comfort items apart until you pack the required gear.
.
-
Weigh before you load. Weigh filled bags, or hold each loaded bag while using a home scale. If the load feels heavy, remove duplicate food, extra clothing, or bulky packaging. Keep safety basics.
.
-
Place items by need. Put food, a phone, route notes, and a light layer in reachable pockets or a top-tube bag. Place tubes and tools in a seat bag. You only need them during a stop.
.
-
Test every pocket and strap. Fill jersey pockets, close each bag, and shake the bike gently. Nothing should bounce, rattle, block pedaling, or make one side feel heavy.
.
-
Check the forecast before bed. Warm weather can raise dehydration and heat illness risk during outdoor exercise. Read the CDC heat guidance for athletes. Adjust bottles, sunscreen, and a light layer for the conditions.
.
-
Set out morning additions. Chill bottles if needed, charge your phone, and put ride-day items with your helmet. Keep keys, wallet, sunglasses, and event materials together. They will be easier to remember.
.
The morning fit-and-ride check
In the morning, add bottles and food, then put on the clothing you plan to wear. Reach for one snack, your phone, and your jacket beside the bike. If you cannot reach one item with one hand, move it before you roll out.
Next, take a short spin close to home or near the start area. Shift gears, brake, stand briefly on the pedals, and listen for bag movement. A load that sways or rubs on a short check will distract you later. Stop and tighten it.
Finish by asking one plain question: will each item help you ride, stay safe, or solve a likely problem? If not, it can stay behind. Packing lightly means keeping the bike steady and the items you need close at hand.
Frequently Asked Questions
What should I bring on a long bike ride?
Bring a helmet, weather-ready layers, water bottles, ride snacks, identification, payment, sunscreen, and a fully charged phone with your route saved. Carry repair basics even on a supported event. Bike to the Beach provides rest-stop hydration, nutrition, basic mechanical support, GPS navigation, and SAG vehicles, according to its event information. Confirm your regional ride instructions for check-in and fundraising day materials.
How much water should I carry on a long bike ride?
Carry enough fluid to reach the next reliable refill point, plus extra for heat, delays, or missed stops. On Bike to the Beach rides, rest stops are positioned every 15 miles with hydration available. In warm conditions, drink regularly instead of waiting for thirst. The CDC warns that exercising in hot conditions increases dehydration and heat-related illness risk.
What snacks are best for a long bike ride?
Pack familiar, easy-to-open foods that provide carbohydrates while riding, such as bananas, fig bars, chews, sandwiches, or sports drink mix. Choose portions that fit in pockets or a small bag. Research indexed by PubMed found that 39 or 64 grams of carbohydrate per hour improved endurance cycling performance. Test your preferred fuel during training before event day.
What tools should I carry for a bike ride?
Carry a spare tube that fits your tire, tire levers, a mini pump or CO2 inflator, and a compact multi-tool. A patch kit and chain quick link add useful backup for longer routes. A supported ride may offer mechanical help, but a simple kit helps you handle a flat or small adjustment between rest stops without waiting for assistance.
What should I wear for a long distance bike ride?
Wear a properly fitted helmet, padded cycling shorts, and moisture-wicking layers that match the forecast. Add gloves, eye protection, and a light rain or wind layer when weather may change. In hot conditions, select lightweight, loose, light-colored clothing and use sunscreen. These warm-weather measures align with CDC guidance for athletes.
Register for a Bike to the Beach ride and give yourself time to test your checklist before event day.
Ready to prepare for a Bike to the Beach ride?
Waiting until ride week can leave you scrambling for gear, food, navigation details, and fundraising materials when your focus should be on riding. Start planning now so you can test what you carry, organize your ride-day essentials, and avoid preventable stress before the event. A prepared start lets you show up ready to ride, connect with the community, and support the cause with confidence.
Ready to put your preparation into action? Contact Bike to the Beach to register for an upcoming ride and begin planning your day with a clear next step. Choose your ride, gather your essentials, and make your commitment while you still have time to prepare well.