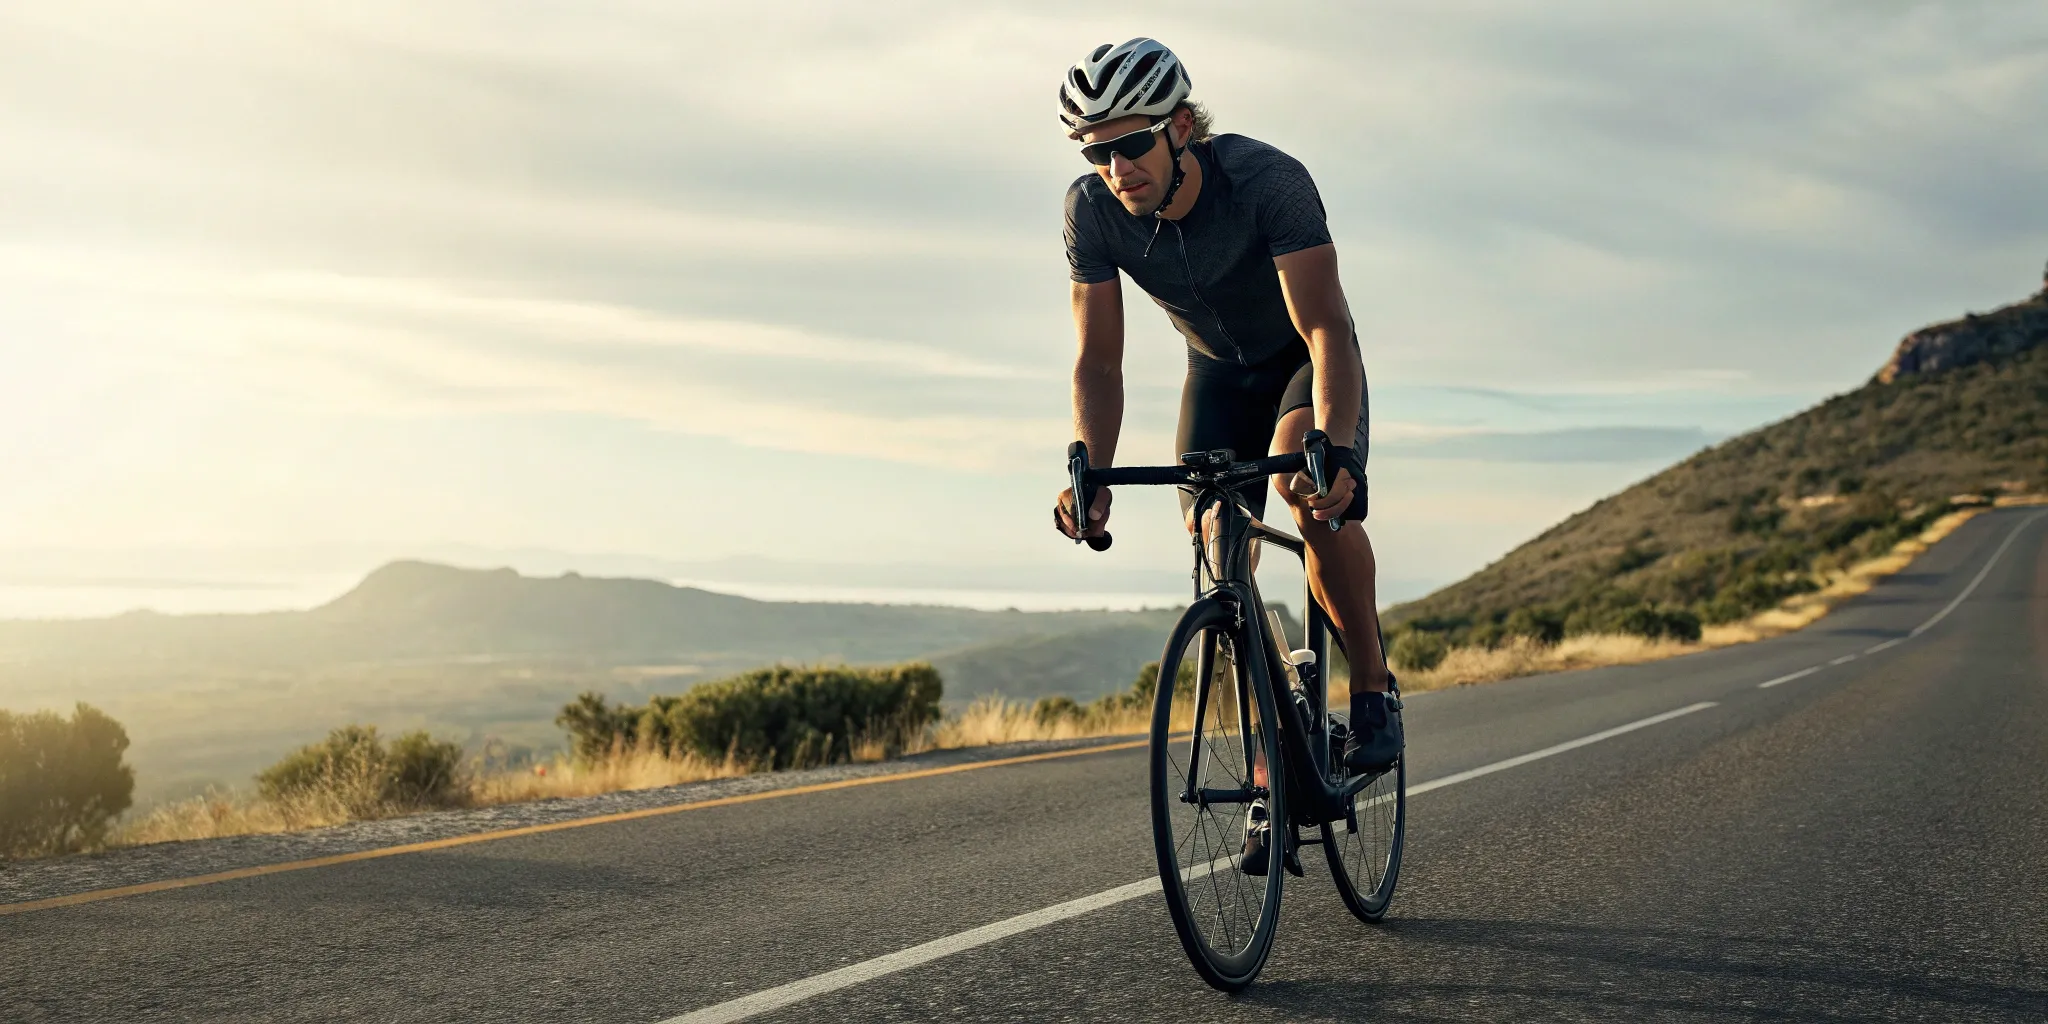
How to Train for a 50-Mile Bike Ride
Get ready for your 50-mile bike ride with this 7-week training plan, practical tips, and fueling strategies to help you finish strong and confident.
You signed up for a 50-mile bike ride. That’s amazing! Now what? Committing to a big ride, especially a charity cycling event like Bike to the Beach, is about purpose. But that purpose can feel distant when your alarm goes off and you’d rather hit snooze. This is where a solid 50-mile bike training plan changes everything. It gives you the structure to build confidence and stay consistent. This guide lays out a practical timeline, essential workouts, and smart fueling strategies, so you can arrive at the start line prepared and focused on the mission.
Key Takeaways
- Commit to a Gradual Training Plan: Give yourself 8 to 12 weeks to prepare for your 50-mile ride. Focus on building a solid fitness base before gradually increasing your weekly mileage—this is the safest and most effective way to build endurance without burning out.
- Train Smarter, Not Just Harder: Your weekly long ride is essential, but so is variety and rest. Incorporate hill workouts to build strength, take easy recovery rides to help your muscles repair, and never skip a rest day. Recovery is when you actually get stronger.
- Practice Your Ride-Day Strategy: Use your long training rides as a dress rehearsal for the main event. Test out your snacks and hydration plan to see what works for you, and make sure your bike and gear are comfortable and reliable. This preparation builds the confidence you need to cross the finish line.
What to Expect on a 50-Mile Ride
A 50-mile ride is a significant achievement, and it’s completely normal to wonder what you’re getting yourself into. The experience is different for everyone, but knowing what to expect helps you prepare mentally and physically, so you can focus on the ride and the incredible cause you’re supporting. This isn’t a race against the clock; it’s a journey you share with hundreds of other people who are just as passionate about making a difference. At Bike to the Beach, we’re with you every pedal of the way with fully supported routes, from our New England ride to our Florida event, ensuring you have what you need to succeed. Let’s break down what the day might look like.
How Long Will It Take?
The most common question we hear is, “How long will this actually take?” The answer really varies. For an average person on a road bike, 50 miles could take anywhere from 2.5 to 5 hours, but your personal time depends on your fitness, the route’s terrain, and how many breaks you take. A hilly course will naturally take longer than a flat one. The best part about a charity ride is that speed is irrelevant. You’re encouraged to stop at the rest stops, take photos, and chat with fellow riders. The goal is to finish with a smile and a huge sense of accomplishment, not to set a personal record.
Common Challenges and How to Prepare
Every long ride comes with a few hurdles, but preparation is your best tool for overcoming them. Factors like rolling hills, unexpected weather, or even a poorly fitting bike can make the day feel tougher. Before your ride, make sure your bike is in good shape—this means your chain is oiled and your tires are properly inflated. It’s also smart to practice your nutrition and hydration during training so you know what works for your body. At our events, we have rest stops stocked with snacks and drinks, but carrying your own favorites is always a good idea. A little planning goes a long way in ensuring you have a smooth and enjoyable experience from start to finish.
How Your Body Will Feel
Let’s be real: after pedaling for 50 miles, you’re going to feel it. Your legs will likely ache, and your backside will probably be sore—but that feeling of fatigue is also a badge of honor for what you’ve accomplished. One of the biggest reasons people struggle on long rides isn’t fitness, but fuel. As one source notes, “Many people run out of energy on long rides because they didn’t eat enough, not because they aren’t fit enough.” This is why practicing your nutrition is so important. Sipping water consistently and eating small snacks every 45-60 minutes will keep your energy levels stable, helping you feel strong all the way to that finish line celebration.
How Long Does It Take to Train for a 50-Mile Ride?
So, you’ve decided to take on a 50-mile ride—that’s amazing! The big question on your mind is probably, “How long will it take to get ready?” For most people, a training window of 10 to 12 weeks is the sweet spot. This gives your body and mind enough time to adapt, build strength, and gain the confidence you need to cross the finish line with a smile. If you’re already comfortable on a bike, you might even be ready in as little as eight weeks. The goal isn’t just to finish, but to feel strong and have fun doing it, especially when you’re riding for a cause and soaking in the community atmosphere.
Preparing for a 50-mile ride is a totally achievable goal, even if it sounds intimidating right now. It all comes down to a smart, gradual approach that respects your body’s limits. Instead of jumping into long, grueling rides right away, you’ll focus on two main things: building a solid fitness base and then following a structured timeline to increase your mileage week by week. This method helps prevent burnout and injuries, ensuring you arrive on event day feeling prepared and excited. Think of it less like a sprint and more like a steady journey. By breaking your training into manageable steps, you’ll see consistent progress that keeps you motivated from your first training ride all the way to the beach.
Start Here: Build Your Base Fitness
Before you start thinking about weekly mileage goals, your first step is to build a solid foundation. This is what cyclists call “base fitness,” and it’s all about getting your body used to spending time in the saddle and becoming more efficient. The best way to start building your base fitness is by going on longer rides at a comfortable, steady pace where you can still hold a conversation. Aim for rides that are two hours or more. These sessions teach your body how to use oxygen more effectively and burn fat for fuel—two things that are crucial for conquering longer distances. It’s not about speed; it’s about time and consistency.
Create Your Training Timeline
Once you feel comfortable with your base fitness, it’s time to get organized. A well-structured training plan is your roadmap to the finish line, taking the guesswork out of your preparation. For beginners, a seven-week plan is a great way to get ready for a 50-mile ride without feeling overwhelmed. The key is consistency. Plan on three to four training sessions each week, with at least three of those being rides on your bike. Your schedule should be flexible enough to fit your life but structured enough to keep you on track. The goal is to gradually increase your mileage each week, making the training feel challenging but enjoyable, not like a chore.
Your Beginner’s Training Plan for a 50-Mile Ride
A great training plan gives you structure and confidence, breaking a big goal into small, achievable wins. This seven-week schedule is designed to do just that, gradually increasing your mileage so your body can adapt and build strength without burning out. The key is consistency. Remember, this is a flexible guide. Listen to your body, take extra rest days when you need them, and have fun with the process. Every ride is a step toward making a real difference for our community.
Focus on Comfort, Not Speed
When you’re just starting out, it’s easy to get caught up in speed and pace. But for endurance events like a 50-mile ride, your main goal should be comfort, not the numbers on your bike computer. The key is to focus on riding the distance comfortably, not quickly. This means getting your body accustomed to spending hours in the saddle and making sure your gear is working for you, not against you. Think padded shorts, a well-fitted helmet, and a bike that feels right. It also means dialing in your nutrition. Many riders run out of steam because they didn’t eat or drink enough, not because they weren’t fit enough. Use your training rides to practice fueling, so on event day, you can focus on the incredible scenery and the community around you.
Plan Your Training Routes Strategically
Where you train is just as important as how often you train. Planning your routes strategically helps you stay safe, build relevant skills, and keep things interesting. Start by finding roads that aren’t too busy or dangerous, which allows you to focus on your form and effort instead of traffic. It’s also smart to check the wind direction and try to ride with it on your way out. As you get more comfortable, mix up your terrain. Find some rolling hills to build strength and practice shifting gears—it will make a huge difference on ride day. And always be prepared: carry a phone and let someone know your route, just in case. A little planning goes a long way in making your training effective and enjoyable.
Weeks 1-3: Build Your Foundation (15-25 miles)
The first few weeks are all about getting comfortable in the saddle and building a solid base. Don’t worry about speed; just focus on finishing the distance. In Week 1, your goal is a 15-mile ride. You’ll likely feel some saddle soreness—that’s completely normal. Give yourself a few days to recover. For Week 2, bump your distance to 20 miles. The discomfort should start to fade as your body adapts. By Week 3, you’ll be ready to tackle 25 miles. You’re building momentum, so focus on finding a steady, comfortable pace.
Weeks 4-6: Push Your Endurance (30-35 miles)
Now it’s time to build the stamina you’ll need for the main event. In Week 4, push your long ride to 30 miles. This is a major milestone! During Week 5, your target is 35 miles. As the rides get longer, remember why you started. Every pedal stroke helps support local families, and that shared purpose is what makes this journey so powerful. Thinking about why we bike can be great motivation when the miles feel long. In Week 6, you’ll take on 40 miles, which requires smart fueling and hydration to keep your energy up.
Week 7: Peak, Taper, and Get Ready to Ride (40-50 miles)
This is the final week of preparation! Early in the week, complete one last long ride of about 40 miles. After that, it’s time to taper—doing shorter, easier rides to let your body rest and recover before the big day. This is the perfect time to do a final check on your bike and gear. On event day, you’ll be ready to conquer the full 50 miles, whether you’re joining us for the New York ride or another one of our amazing events. Trust your training, stay hydrated, and enjoy the incredible experience you’ve worked so hard for.
Essential Workouts for Your Training Plan
A great training plan is about more than just logging miles. To build balanced fitness, you’ll want to mix up your efforts with different types of rides. Focusing on specific workouts will help you build endurance for the long haul, strength for tough spots, and the confidence you need to cross the finish line with a smile. These key workouts are the building blocks of a successful training plan.
Add Long, Steady Rides to Build Stamina
Your most important workout each week is your long, steady ride. This is where you build your base fitness and teach your body to be efficient over many miles. The goal isn’t speed; it’s about spending time in the saddle at a comfortable, conversational pace. These rides help your body use oxygen better and burn fat for fuel, which is exactly what you need for a 50-mile journey. Think of it as preparing for the beautiful, scenic routes of our New England ride.
Tackle Hills to Build Strength
Even if your route is mostly flat, incorporating hills into your training is one of the best ways to build power. Hill repeats are a fantastic strength workout. Find a local hill, ride up at a strong effort, and cruise back down to recover. Repeating this a few times is a challenge, but it makes you a stronger cyclist. Pushing through that discomfort is a powerful reminder of why we bike—to push past limits for a cause we believe in.
Don’t Skip Your Recovery Rides
Rest is just as important as your workouts. Active recovery, like a short and easy spin, helps your muscles bounce back faster. A recovery ride should feel effortless—just a gentle 20-minute ride to get the blood flowing. As your event gets closer, be careful not to overdo your training. You want to arrive at the starting line feeling fresh and strong, not tired. Listening to your body and giving it the rest it needs is a crucial part of the process.
Plan a Full-Distance Dress Rehearsal
About two weeks before your 50-mile event, it’s time for a dress rehearsal. Plan a ride that’s close to the full distance, around 40 miles. This is your chance to test everything: your gear, your nutrition strategy, and your pacing. Completing this ride is a huge confidence builder and helps you work out any kinks before the big day. For more tips and stories from our community, you can always check out the Bike to the Beach blog.
Fueling Your 50-Mile Ride: What to Eat and Drink
Your training plan gets your muscles ready, but your nutrition plan is what carries you across the finish line. Many cyclists run out of energy on long rides because they haven’t eaten enough, not because they aren’t fit enough. Think of your body as a car—you can have the best engine in the world, but without gas in the tank, you aren’t going anywhere. Planning what you eat before, during, and after your 50-mile ride is just as important as any workout you do.
A solid fueling strategy prevents the dreaded “bonk,” where your energy levels suddenly crash. It also helps your body recover faster so you can feel proud of your accomplishment instead of just feeling sore. The key is to be intentional. You’ll want to practice your nutrition during your longer training rides so you know exactly what works for you on event day. Let’s walk through how to plan your meals and snacks for a strong, successful ride.
What to Eat Before You Ride
Your ride-day fueling starts the night before. Aim for a balanced dinner with plenty of complex carbohydrates, like pasta, rice, or potatoes. This helps top off your glycogen stores, which are your body’s primary energy source for endurance activities. The morning of the ride, eat a substantial but easily digestible breakfast about two to three hours before you start pedaling. Oatmeal with fruit, a bagel with peanut butter, or whole-wheat toast with eggs are all great options. The goal is to give your body time to digest, so you start with a full tank of energy. Avoid anything overly fatty, greasy, or high in fiber, and stick to foods you know your stomach handles well.
What to Eat and Drink on the Bike
Once you’re on the bike, the key is to eat and drink consistently, not just when you feel hungry or thirsty. By then, it’s often too late. A good rule of thumb is to have a small snack every 45-60 minutes to keep your energy levels stable. Pack portable, easy-to-eat snacks like bananas, energy gels or chews, or small nutrition bars. At Bike to the Beach, our routes are fully supported with rest stops stocked with snacks and drinks, so you can refuel and connect with the community along the way. Our New England ride, for example, has everything you need to keep going. Practice eating your chosen snacks during training to make sure they work for you.
Master Your Hydration Strategy
Hydration is critical for performance and safety. Start sipping water in the first few miles and continue taking small, regular sips every 15-20 minutes throughout the ride. For a 50-mile ride, especially in warm weather, water alone may not be enough. You also lose essential electrolytes like sodium and potassium through sweat, which can lead to cramping and fatigue. Consider bringing a bottle with an electrolyte drink mix to sip on in addition to plain water. Our rest stops are always equipped with both, so you can refill your bottles and stay properly hydrated from start to finish. Remember the golden rule: drink before you feel thirsty.
Refuel for a Faster Recovery
What you do after you cross the finish line matters just as much as what you do during the ride. Your body has worked hard, and it needs the right nutrients to repair muscle tissue and replenish its energy stores. Aim to have a recovery snack or meal within 30-60 minutes of finishing. The ideal recovery fuel contains a mix of protein and carbohydrates. Chocolate milk is a popular and effective choice, but a protein shake, a smoothie, or a meal with chicken and rice also works perfectly. This simple step helps reduce muscle soreness and gets you ready to celebrate the incredible impact you’ve made by supporting why we bike.
What Gear Do You Need for a 50-Mile Ride?
Having the right gear isn’t about having the most expensive equipment—it’s about being safe, comfortable, and prepared. A 50-mile ride is an incredible achievement, and the right setup will help you enjoy every mile. While our Bike to the Beach rides are fully supported with rest stops and support vehicles, carrying a few key items will give you the confidence to handle anything that comes your way. Think of it as your personal toolkit for success. From a well-tuned bike to the right pair of shorts, a little preparation goes a long way in making your ride a fantastic experience. We’ll walk through the essentials you’ll want to have with you on ride day and during your training.
Your Bike and Essential Tool Kit
Your bike is your partner for this journey, so give it some attention before you head out. A few days before a long ride, make sure your bike is in good shape. Check your tire pressure, test your brakes, and oil the chain if it looks dry. If you’re not sure what to look for, a local bike shop can perform a quick tune-up. You should also carry a small repair kit for unexpected issues like a flat tire. Pack a saddle bag with two spare inner tubes, tire levers for removing the tire, a mini-pump or CO2 canisters to re-inflate it, and a multi-tool for any small adjustments.
Practice Your Repairs at Home
While our Bike to the Beach rides are fully supported with mechanics and support vehicles, knowing how to handle a quick fix yourself is a huge confidence builder. The most common issue you might face is a flat tire, and there’s nothing worse than fumbling with levers and tubes on the side of the road for the first time. That’s why so many experienced cyclists recommend practicing at home. Before you even start your training, watch a few videos on how to change a flat tire and then actually do it. Take the wheel off, remove the tire, and replace the tube in the comfort of your garage. It might feel awkward at first, but a little practice will make you feel prepared and self-sufficient on ride day.
Tire Inflation: CO2 vs. Hand Pump
Once you’ve replaced a flat tube, you need to get air back in it. You have two main options: a CO2 inflator or a small hand pump. CO2 inflators are fast and easy, filling your tire in seconds. However, the cartridges are single-use, and it’s surprisingly easy to mess up your first attempt, which is why it’s smart to carry at least two. A mini-pump, on the other hand, is endlessly reliable. It takes more effort and time to pump up a tire manually, but you’ll never run out of air. Many riders choose to carry both—a CO2 for a quick fix and a small pump as a foolproof backup plan.
Small Items That Make a Big Difference
Beyond your basic repair kit, a few small essentials can make a huge difference in your comfort and safety. Always ride with your phone fully charged, along with your ID and a credit card or some cash for emergencies. Sunscreen is another must-have, even on cloudy days, and a small tube of lip balm with SPF can be a lifesaver. It’s also a good idea to write down key contact information on a small card in case your phone runs out of battery. While our rest stops are stocked with supplies, having these personal items on hand ensures you’re ready for anything the ride throws your way.
How to Carry Your Gear
Now, where do you put all this stuff? The most popular solution is a small saddle bag that tucks neatly under your bike seat. It’s the perfect place to store your repair kit—spare tubes, levers, a multi-tool, and your inflator—without getting in your way. For items you need to access more easily, like your phone and snacks, the back pockets of a cycling jersey are ideal. If you need a bit more space, you could also consider a small top-tube bag that sits on your frame just behind the handlebars. The goal is to carry what you need without weighing yourself down, keeping everything secure and balanced for a smooth ride.
What to Wear for a Comfortable Ride
You don’t need a professional race kit, but what you wear matters. The single most important piece of clothing you can invest in is a good pair of padded cycling shorts. They prevent chafing and add cushion where you need it most, making a huge difference in your comfort over 50 miles. Pair them with a moisture-wicking jersey (avoid cotton, which traps sweat) to stay dry and cool. Cycling gloves can also help by reducing pressure on your hands and preventing blisters. And of course, you can always represent the cause with official Bike to the Beach gear from our shop.
Safety Gear You Shouldn’t Ride Without
Safety is always the top priority. First and foremost, always wear a helmet. It’s non-negotiable. For visibility, consider using front and rear bike lights, even during the day, and wear bright-colored clothing so drivers can easily see you. Beyond that, make sure you have at least two water bottles on your bike, filled and ready to go. You’ll also want to carry your ID, a phone, a credit card, and some cash, just in case. While our rest stops are stocked with snacks, it’s a good idea to have your preferred ride fuel with you, too.
Common Training Mistakes to Avoid
As you get into the rhythm of training, it’s easy to fall into a few common traps. But with a little awareness, you can sidestep them entirely, making your preparation smoother and more enjoyable. Think of training as a journey, not a race. The goal isn’t just to cross the finish line, but to arrive there feeling strong, accomplished, and ready to celebrate.
Avoiding burnout and injury is key to a successful training season. It ensures you can stick with your plan and show up on ride day with confidence. The most effective training isn’t about pushing yourself to the absolute limit every single day. Instead, it’s about consistency, smart planning, and listening to your body. Let’s walk through a few pitfalls to watch out for so you can train smarter, not just harder, and have a fantastic experience supporting a cause you care about. Remember, every pedal stroke is making a difference for local autism and disABILITY communities.
Mistake #1: Adding Miles Too Quickly
When you’re feeling motivated, it’s tempting to jump from a 15-mile ride one week to a 30-mile ride the next. But increasing your mileage too quickly is one of the fastest ways to get injured or burn out. Your body needs time to adapt to the new demands you’re placing on it. A good rule of thumb is to increase your long-ride distance by about 10-15% each week. This gradual progression helps prevent overuse injuries and mental fatigue, allowing your muscles, joints, and endurance to build sustainably. Slow and steady really does win the race here.
Mistake #2: Ignoring Your Bike Fit
If you’re experiencing nagging aches, numbness in your hands, or pain in your knees or back during longer rides, don’t just push through it. These are often signs that your bike doesn’t fit you properly. A professional bike fit can make a world of difference, adjusting your seat height, handlebar position, and more to match your body’s mechanics. It’s a small investment that pays off big in comfort, efficiency, and injury prevention. A well-fitted bike will feel like an extension of your body, letting you focus on the ride and the beautiful scenery on your way to the beach.
A Quick Tip for Setting Your Saddle Height
Knee pain on a long ride? Your saddle height is one of the most common culprits. Here’s a simple trick to get it right: while leaning against a wall for support, sit on your bike and place your heel on one of the pedals. Rotate that pedal to the bottom of its stroke—the 6 o’clock position. At this point, your leg should be almost completely straight. Now, when you slide your foot forward into a normal riding position with the ball of your foot over the pedal, you should have a slight, comfortable bend in your knee. This small tweak makes a huge difference, giving you proper leg extension to prevent strain and help you pedal more efficiently. When your bike fit is dialed in, you can focus on the ride and the incredible community around you—not on aching knees—and fully embrace why we bike.
Mistake #3: Skipping Rest Days
Rest is not a sign of weakness—it’s a critical part of your training. Your muscles don’t get stronger during your rides; they get stronger when you give them time to recover and rebuild afterward. Make sure to schedule at least one or two rest days each week. Ignoring your body’s need for rest can lead to overtraining, fatigue, and a decline in performance. A rest day doesn’t have to mean sitting on the couch all day. You can do some light stretching, go for a walk, or simply enjoy a day off the bike. Listen to your body and give it the downtime it needs.
Mistake #4: Forgetting Your Fuel Plan
You wouldn’t start a long road trip with an empty gas tank, and the same logic applies to your body. Proper nutrition and hydration are essential for endurance cycling. Before a long ride, have a balanced breakfast, and during the ride, plan to refuel every 45-60 minutes. Use your training rides to experiment with different snacks like energy gels, bananas, or granola bars to see what works best for you. While all Bike to the Beach rides are fully supported with rest stops and snacks, it’s important to practice your personal fueling strategy ahead of time so there are no surprises on event day.
How to Stay Motivated During Your Training
Training for a 50-mile ride is a big commitment, and let’s be honest, some days it’s tough to get on the bike. Life gets in the way, the weather doesn’t cooperate, or your couch just looks way too comfortable. When your initial excitement starts to fade, it’s important to have a few strategies to keep you going. The key is to make the training process enjoyable and connect it back to your “why”—the reason you signed up in the first place.
Remembering that every ride is preparing you to support an incredible cause can be a powerful motivator. You’re not just training for yourself; you’re training to make a real difference for individuals and families in your community. At Bike to the Beach, we’re all about shared action and community involvement, and that spirit can start long before event day. Think of your training as the first step in your journey. By staying committed, you’re already honoring the purpose behind why we bike. The following tips are practical ways to keep that momentum going, turn challenges into achievements, and make sure you arrive at the starting line feeling confident and proud.
Set Small, Achievable Goals
Looking at a 50-mile goal can feel intimidating, but breaking it down makes it manageable. Instead of focusing on the final distance, concentrate on what you need to do this week. Your training plan is a guide, not a strict set of rules. Maybe this week’s goal is to complete a 20-mile ride without stopping, or maybe it’s just to get on your bike three times. These smaller, achievable goals give you a sense of accomplishment that builds over time. Each week you hit your target is a win, proving to yourself that you’re getting stronger and closer to your ultimate goal. This approach keeps you from feeling overwhelmed and helps you build momentum one ride at a time.
Find a Riding Buddy or Join a Group
Everything is better with a friend, and training is no exception. Teaming up with a riding buddy or a local group is one of the best ways to stay accountable and make your training rides more fun. A friend can offer encouragement when you’re struggling up a hill and celebrate with you when you finish a long ride. It’s also a lot harder to skip a workout when you know someone is waiting for you. This is a great way to get a taste of the camaraderie you’ll experience at the main event. You can connect with cyclists in your local Bike to the Beach community or join a nearby cycling club to find people who can share the journey with you.
Track Your Progress and Celebrate Every Win
Seeing how far you’ve come is a huge motivator. Use a simple cycling app or even a notebook to keep track of your rides—note the distance, your time, and how you felt. When you have a tough day, you can look back and see the tangible progress you’ve made since week one. And don’t forget to celebrate your wins, big and small! Did you conquer a hill that used to defeat you? Did you finally figure out your pre-ride nutrition? These moments deserve a little celebration. Acknowledging these small victories keeps your spirits high and reminds you that your hard work is paying off, building the confidence you need to cross that finish line.
Related Articles
Frequently Asked Questions
What if I’m starting from scratch and haven’t been on a bike in years? That’s perfectly fine, and you’re in the right place! The key is to start slow and give yourself a little extra time. Before jumping into a structured plan, spend a couple of weeks just getting reacquainted with your bike. Go for short, casual rides around your neighborhood to build confidence. Focus on feeling comfortable with braking, shifting gears, and just balancing. Once you can comfortably ride for 30-45 minutes, you’ll be ready to start the training plan.
Do I really need to buy special cycling clothes and gear? You definitely don’t need to look like a pro cyclist to complete a 50-mile ride. Comfort and safety matter far more than fancy gear. If you’re going to invest in one piece of cycling gear, make it a pair of padded cycling shorts — they make a world of difference on longer charity bike rides. A properly fitted helmet is also non-negotiable for safety. For your top, choose breathable, moisture-wicking fabrics and avoid cotton, which traps sweat and can cause chafing. The good news? Riders at Bike to the Beach receive an official cycling jersey as part of the event, giving you a comfortable, performance-ready shirt designed specifically for long miles in the saddle — and a great way to show your support for the autism community while you ride.
I’m worried I’ll be too slow or get left behind. What’s the pace like at a charity ride? This is such a common concern, but you can put it out of your mind. A charity ride like Bike to the Beach is not a race. It’s a community event with people of all ages and fitness levels, all riding for the same reason. You’ll see fast cyclists, casual riders, and people who are brand new to the sport. The vibe is incredibly supportive. You can ride at your own pace, take breaks at the rest stops, and enjoy the journey. The goal is to finish and feel great about what you’ve accomplished.
What’s the single most important thing to focus on if my training time is limited? If you can only fit in one key workout each week, make it your long, steady ride. This is the ride where you gradually increase your mileage week after week. It’s the most effective way to build the endurance you’ll need to comfortably complete 50 miles. While other workouts like hill repeats are beneficial, nothing prepares your body for a long day on the bike quite like spending time on the bike. Consistency with this one ride will make the biggest impact.
What happens if I get a flat tire or feel like I can’t finish the ride? What happens if you get a flat tire or feel like you can’t finish the ride? That’s exactly why participating in a fully supported event like Bike to the Beach makes all the difference. You’re never alone on the course. Our supported bike rides include roaming SAG vehicles that patrol the route to assist with mechanical issues like flat tires, quick repairs, or even a lift to the next stop if you’re feeling fatigued. You’ll also find fully stocked rest stops every 12–15 miles with water, snacks, electrolytes, and enthusiastic volunteers ready to keep you motivated. From start to finish, our goal is simple: provide a safe, supported, and positive charity cycling experience so you can focus on riding strong and enjoying the day.